

It's really fun learning new things everyday. Like what I always said, we humans discovered something each special day. I'm here to teach you now how to put Like Button on your website. As a newbie in blogging we should oblige ourselves to learn things that are related to what we love doing.
I hope this will help :)
Why we need to put Like Button to our Website ( Blogger )
As we all know there are millions of Facebook users surfing the internet and getting new information. It is a must to put up a page in extension to your blog. This is a way of generating large traffic from millions of potential viewers. I'm sure you wouldn't like to miss a massive source of audience, do you ?
The Like Button that you are putting on your blog will also serve as the wire connecting your blog to a usual netizen who only have his or her Facebook account. This also serve as a reflection on how people like or how many people recommend your blog to others.
How to put Like Button to your Website ( Blogger )
You should go first here : https://developers.facebook.com/docs/plugins/like-button/
Here's how it looks like.

1 STAGE
Step 1 : Put the url of the page you prefer to like. ( Facebook page of your Blog )
Step 2 : Choose the layout you want. ( it may be box count, button count, standard or button )
Step 3 : Choose the width you want. ( You may base on how your blogs layout )
Step 4 : Choose if you want it to be LIKE or be RECOMMEND .
Step 5 : The number 5 there is the preview of your chosen format from above.
Step 6 : Get the Code ( Copy the code and lets go to your Blogger account)
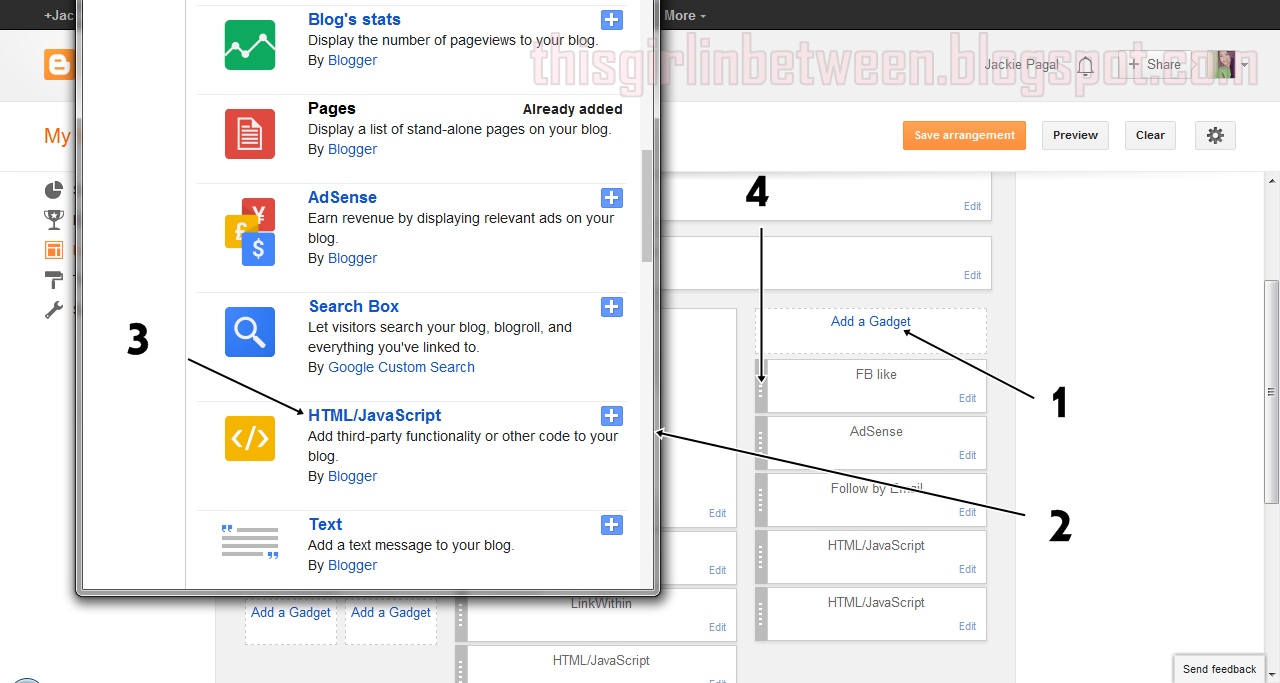
Stage 2
Step 1 : Just go to your layout and click the "Add a gadget
Step 2 : It's just a photo of what will appear when you do step 1.
Step 3 : Find the HTML/JavaScript the open it. Here is where you are going to paste your code.
then save it.
Step 4 : Drag the Gadget anywhere you want to place it.
WOLA !!
No comments:
Post a Comment